
Quick Start
This page builds a working scene: a player who reveals the fog of war, and a guard with a vision cone who notices the player. Pick the section for your game: 2D top-down, 3D or 2D isometric.
Add the renderer feature first. The steps work without it, but then only the Color and Texture fog styles are available.
2D top-down
1. Walls
Give your walls 2D colliders: Box Collider 2D, Polygon Collider 2D, Tilemap Collider 2D (with or without a Composite Collider 2D) and so on. Nothing else is needed: by default a source is blocked by colliders on every layer.
Characters usually should not block each other's view. Put them on a layer named Characters and remove it from Blocked By on the sources. If that layer exists, the Vision Source Inspector offers to exclude it with one click. A target's own colliders never hide the target itself.
2. Player
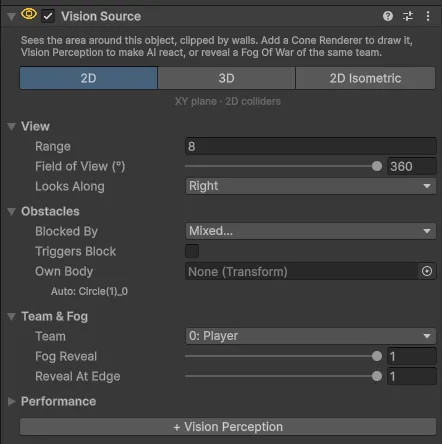
- Select the player and add Vision Source component.
- Keep the 2D tab. Set Range, for example 8, and Field of View to 360 to see all around.
- Keep Team at 0 (Player).
Own Body is found automatically: the closest parent with a Rigidbody 2D. Colliders of the body never block its own view.
3. Fog
- Create an empty object, name it
Fogand add Fog Of War component. - Keep the 2D tab and Team 0.
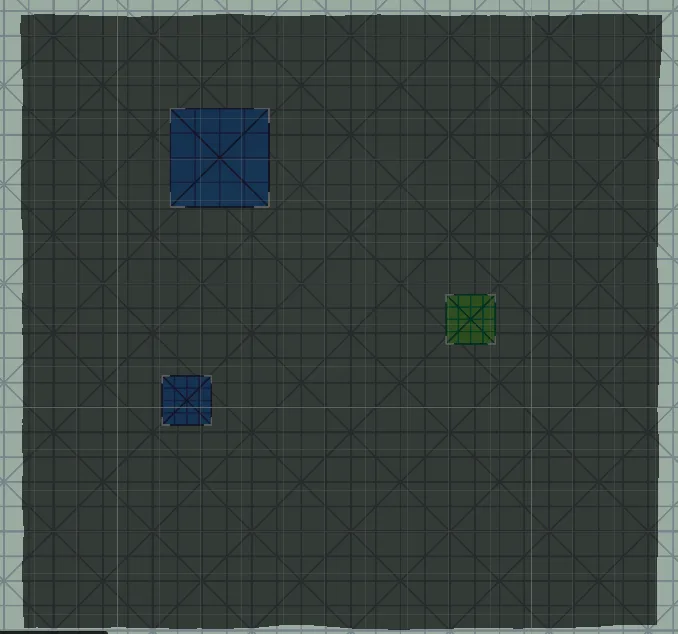
- Click Fit Area To Scene, or click Edit Area and drag the edges of the rectangle in the Scene view.
- Press Play. The fog covers the level and opens around the player.
The fog is hidden while you edit, so it does not cover the level. Turn on Preview In Edit Mode to see it.
4. Guard
- Select the guard and add Vision Source. Set Team to 1 (Enemies), Field of View to 90, and Looks Along to the side the sprite faces.
- Add Vision Cone Renderer. It finds the source on the same object.
- Add Vision Perception. Optionally click New next to Profile to create a Detection Profile you can tune and share.
- Add Fog Hider with Shown To Team 0. The guard is now hidden while the player does not see it.
The Fog Hider hides all renderers on its object and its children, including the cone. To keep the cone visible all the time, put the Fog Hider on the guard's sprite child instead.
5. Target
Select the player and add Vision Target. Press Play and walk into the guard's cone: the cone turns orange, then red, and an alert zone grows from the guard's eyes towards the player.
6. React to the player
Use the events of Vision Perception in the Inspector (On Spotted, On Suspicious, On Alerted, On Lost, On Calmed), or subscribe in code:
using Renvix.VisionFog;
using UnityEngine;

public class GuardReaction : MonoBehaviour
{
    void Awake()
    {
        var perception = GetComponent<VisionPerception>();
        perception.BecameAlerted += (observer, target) => Debug.Log($"{name} detected {target.name}");
        perception.Lost += (observer, target) => Debug.Log($"{name} lost sight of {target.name}");
    }
}
3D
The steps are the same as in 2D, with these differences.
Obstacles use 3D colliders. Vision is computed at the height of the source's eyes: each collider is cut at that height. An obstacle lower than the eyes does not block the view.
Vision Source. Select the 3D tab. The source looks along the object's forward axis (blue arrow), and the object's height is the eye height. Put the source on an Eyes child at head height. Own Body finds the closest parent with a Rigidbody or Character Controller; if it does not, the Inspector offers Use Parent.
Vision Cone Renderer. In 3D the cone is drawn flat at its own object's height. Add it to a child object at floor level. If the cone is at eye height, the Inspector offers To Floor.
Fog Of War. Select the 3D tab and choose how the fog meets the scene:
- Flat: a horizontal fog layer at the object's height. Place the Fog object just above the floor.
- On geometry: the fog covers walls and props at any height and camera angle. Needs the renderer feature.
The area Size is in X and Z.
2D isometric
The steps are the same as in 2D, with these differences.
Mode. Select the 2D Isometric tab on every Vision Source and Fog Of War. Range and angles are measured on the ground, so a circle of view looks like a squashed ellipse on screen, like the tiles.
Proportions. Assign the Grid of your isometric tilemap to Isometric Grid: its Cell Size sets the proportions. If the scene has an isometric grid, the Inspector offers Use Grid. Without a grid, enter the tile size, for example 1 × 0.5 for a common 2:1 grid.
Obstacles. Use 2D colliders, for example a Tilemap Collider 2D on the walls tilemap.
Sorting. The cone lies on the ground, so it must be drawn below walls, props and characters but above the floor. Set its Sorting Layer and Order in Layer accordingly. If the cone is drawn over an obstacle, its Inspector shows a warning.